A detachable modular house is built for speed, flexibility, and reuse. Unlike conventional construction, every component — columns, beams, wall panels, roof panels, and connectors — is designed to be assembled with standard tools and taken apart without damage when the project moves on. Whether you are setting up site accommodation, a temporary office, or a permanent budget-friendly home, this guide walks you through the full process from pre-installation checks to safe dismantling.
What Is a Detachable Modular House?
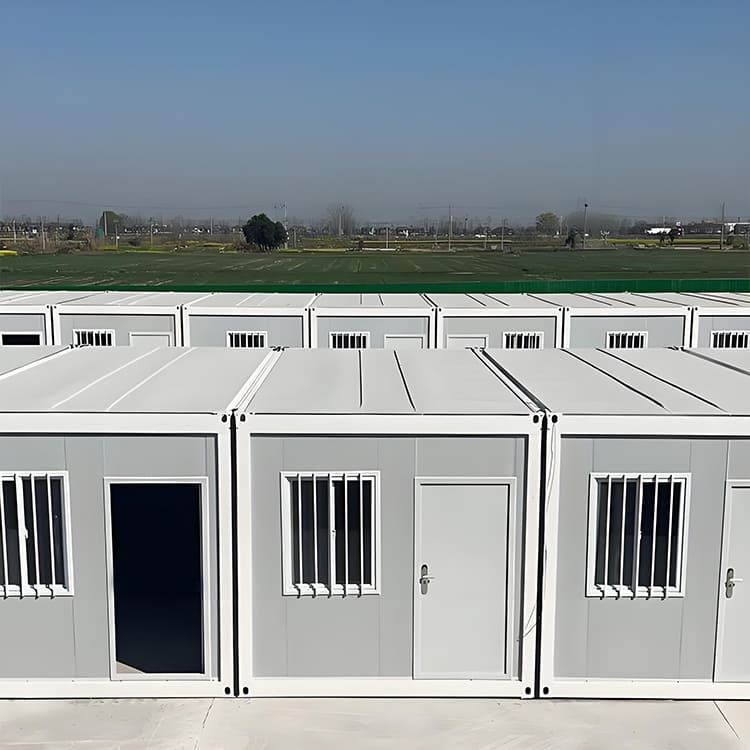
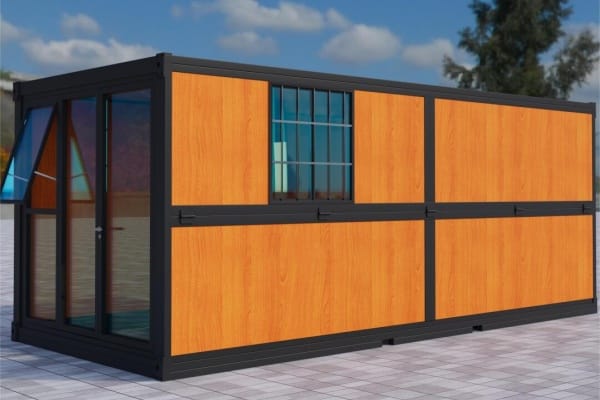
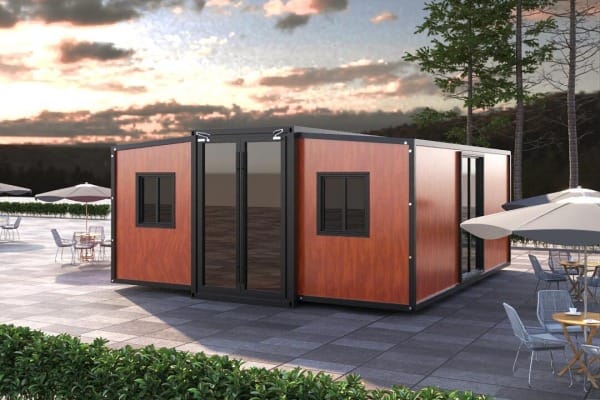
A detachable modular house is a prefabricated steel-frame structure whose parts connect through preset bolt points and interlocking joints rather than welding or permanent bonding. The key advantage is reversibility: the same components can be disassembled, transported, and reassembled on a different site with minimal waste. Most single-story units can be installed by a four-person crew in two to five days, depending on size and site conditions.
Common uses include worker dormitories, construction site offices, emergency shelters, tourism cabins, and small family homes on rural or semi-rural land.
Pre-Installation Checklist
Good preparation is the difference between a smooth two-day install and a week of corrections. Complete every item below before the first component is lifted.
| Checklist Item | What to Verify |
|---|---|
| Foundation | Level surface, correct diagonal measurements, anchor positions match design drawings |
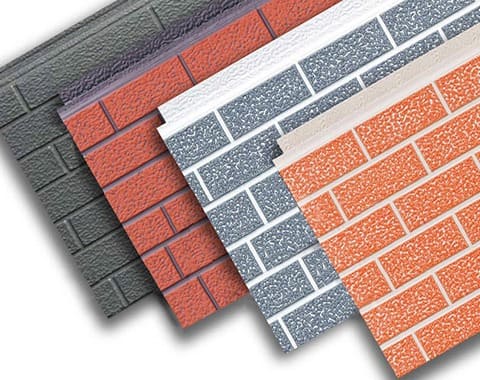
| Materials inventory | Columns, beams, wall panels, roof panels, trims, and anchors all present and undamaged |
| Fasteners & sealants | High-strength bolts, self-tapping screws, sealing washers, butyl tape, and sealant in correct quantities |
| Tools | Torque wrench, impact driver, laser level, lifting slings, PPE for all crew members |
| Documents | Structural drawings, anchor detail sheets, bolt torque specification tables |
| Crew | Minimum four people with clearly assigned roles |
Do not begin assembly if any structural component is missing or visibly damaged. Substituting non-specified parts for bolts or connectors compromises structural integrity and voids manufacturer warranties.
Step-by-Step Installation Process
Step 1: Set the Base Frame
Place the base frame flat onto the prepared foundation. Use a laser level to confirm it is perfectly horizontal before inserting any columns. Even a small deviation at this stage will compound through every layer above it.
Check diagonal measurements across the full frame — both diagonals must be equal. If they are not, adjust the frame position before continuing. Confirm that all anchor holes align with the foundation anchor points.
Step 2: Erect Columns and Add Temporary Bracing
Insert columns into their preset socket holes in the base frame. Do not fully tighten anchor bolts at this stage — snug only. Temporary diagonal bracing must be fitted immediately after each column is placed to prevent movement. Final tightening happens after all modules are positioned and the full frame is confirmed plumb and square.
A common mistake is tightening bolts module by module as you go. This locks in any accumulated alignment error. Always complete positioning of the full frame first, verify all measurements, then torque all bolts to specification in a single pass.
Step 3: Install Top Beams and Tighten to Torque
Once all columns are standing and braced, install the top beams. Align each beam with the column heads before inserting bolts. Insert all bolts loosely across the full beam run, then tighten progressively from center to ends to distribute load evenly.
Use a calibrated torque wrench and tighten to the value specified in your documentation. Record every torque reading in a log sheet — this is both a safety record and a warranty requirement for most manufacturers. Do not use an impact driver for final tightening; it cannot deliver a precise torque value.
Before cutting any openings for doors or windows, install the reinforcement frames specified in the drawings. Cutting without reinforcement first will compromise the structural load path in that wall panel.
Step 4: Install Wall Panels
Begin wall panel installation from the corners and work toward the center of each wall run. Apply butyl tape along the entire contact surface before placing each panel, then press firmly to ensure full adhesion before fastening.
Use sealing washers on every screw penetration point. A missing washer is a future leak point. For multi-story structures, complete and verify all connections on the lower story before beginning the upper story. Use only manufacturer-certified connectors at stacking joints — these are engineered for the specific load transfer between levels.
Step 5: Install Roof Panels and Weatherproofing
Lay roof panels following the drainage direction indicated in your drawings — typically from ridge toward eaves. Overlap panels in the direction that sheds water away from the joint rather than into it.
Install ridge trim, eave trim, and all corner trim pieces as each section is completed rather than leaving them all to the end. Trim protects exposed edges from water infiltration and panel uplift in wind. Once all panels and trim are in place, perform a hose test: run water over the roof and all wall joints and check for any interior penetration. Seal any gaps found with the specified sealant before sign-off.
Step 6: Final Safety Checks
Before handing over the completed structure, verify the following:
All bolts meet specified torque values and are logged. All panel joints are sealed and pass the hose test. Anchors are installed and tight. The steel frame is electrically grounded. All doors and windows open, close, and latch correctly. Any site-specific requirements such as wind uplift straps or snow load reinforcements specified by local building regulations are in place.
Dismantling: How to Take It Down Without Damage
The ability to reuse components depends entirely on how carefully they are removed. Rushing dismantling is the fastest way to turn reusable parts into scrap.
Step 1 — Disconnect all utilities first. Shut off electrical supply at the main breaker, isolate and drain all water lines, and confirm no active connections remain before touching any structure.
Step 2 — Remove trims and hardware. Take off all roof trims, corner trims, eave pieces, door hardware, and window fittings. These are the most easily damaged items and must be removed before panels can be safely extracted.
Step 3 — Remove roof panels, then wall panels. Always work top-down. Protect panel edges during removal to prevent deformation that would prevent reuse. Stack and bundle panels in matching sets and wrap edges for transport.
Step 4 — Loosen the frame gradually. Do not remove all bolts from a beam or column at once. Maintain temporary bracing until the final moment of removal. Loosen bolts progressively across the full frame rather than completing one section before moving to the next.
Step 5 — Label and pack all components. As each element is removed, label it according to its position in the original drawing. Pack fasteners, washers, and small fittings into clearly marked bags. A well-labeled disassembly saves days of guesswork on the next site.
Key Safety Rules at a Glance
Never cut a wall opening before installing the specified reinforcement frame. Always use a torque wrench for final bolt tightening and record every value. Ground the steel frame to the electrical system before energizing any circuit. Size foundation anchors to the local wind load requirement, not just manufacturer minimums. Never stack units beyond the number of levels tested and certified by the manufacturer.
Frequently Asked Questions
Q1: How many people do I need to install a detachable modular house? A minimum crew of four is recommended for standard single-story units. Each person should have a clearly defined role: one managing structural alignment, one operating the torque wrench and logging readings, and two handling panel placement. Larger or multi-story projects may require six to eight workers plus a crane operator.
Q2: How long does installation take? A standard single-story unit of 20 to 40 square meters typically takes two to four days for an experienced crew. A larger multi-module building of 80 to 120 square meters generally requires five to seven days. Site access, weather, and foundation readiness are the most common causes of delay.
Q3: Can I install a detachable modular house on uneven ground? The foundation must be level before installation begins. On sloped terrain, a stepped concrete pad or adjustable steel pier foundation can be used to create a level installation surface. Do not attempt to compensate for uneven ground during frame assembly — this introduces stress into the structure that will cause joint failures over time.
Q4: How many times can the structure be disassembled and reassembled? With careful handling and proper storage between uses, quality steel components can typically be reassembled five to ten times or more without significant degradation. The main wear items are sealant materials and sealing washers, which should be replaced with new materials on each reassembly.
Q5: Do I need a building permit for a detachable modular house? This depends entirely on your local jurisdiction, the intended use, and whether the structure is classified as permanent or temporary. Many regions have a simplified permit pathway for temporary or relocatable structures. Confirm requirements with your local planning authority before installation — your manufacturer should be able to provide engineering documentation to support the permit application.
Q6: What foundation type is most suitable? For firm, well-drained soil, a concrete pier or spread footing under each column is standard and cost-effective. For sites with poor drainage or soft soil, a full concrete slab or driven steel pile foundation may be required. Coastal or high-wind areas need anchor bolts sized to resist uplift loads, which should be specified by a structural engineer based on local wind zone data.
Q7: What is the lifespan of a detachable modular house? The steel structural frame, when properly galvanized or coated and maintained, has a service life of 20 years or more. Wall and roof panels typically require inspection every five years, with replacement of seals and washers as needed. The modularity of the system means individual panels can be replaced without rebuilding the entire structure.
Need floor plans, technical drawings, or a quote for your project? Contact our team at besthouse@besteelstructure.com for customized specifications and support.