Skip to content

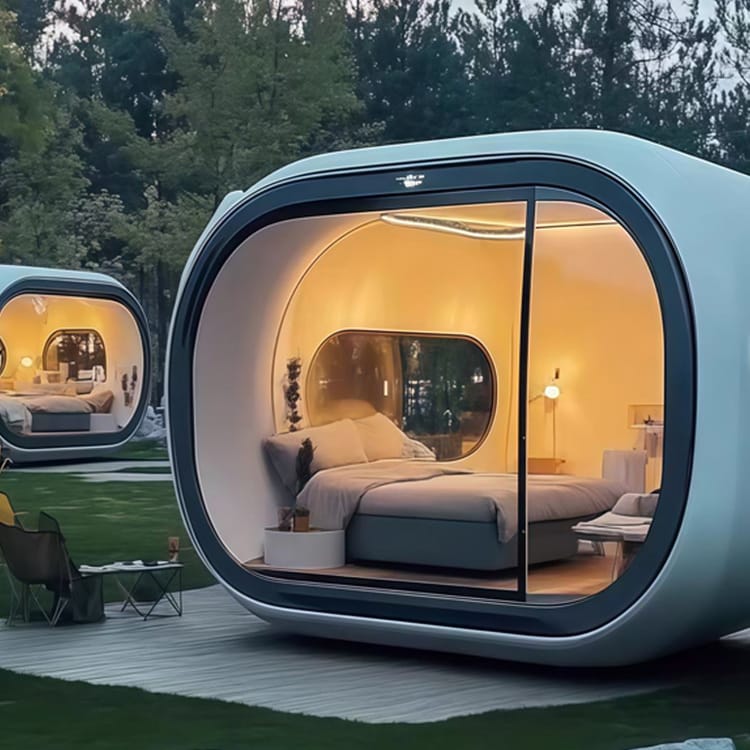
Guests waking up to fresh powder, stepping outside, and walking straight to the lift line — that’s the pitch behind capsule house villages at ski resorts. These compact, factory-built pods function like tiny modern cabins: fast to install, hotel-comparable in comfort, and increasingly used by mountain destinations that need to add lodging capacity quickly without a multi-year construction timeline.
This guide consolidates the full planning process into one reference — from defining your guest concept through site selection, layout design, and phased construction — so you don’t have to piece it together from three separate articles.
1. Define Your Concept and Target Guests
Guest clarity drives every downstream decision: pod design, pricing, and amenities all follow from knowing who you’re building for.
Core guest segments for a capsule village typically break into three groups:
- Budget skiers — prioritize slope proximity over room size; compact, affordable pods are the right fit
- Design-driven couples — want a unique, modern stay with strong views and smart layouts, and will pay a premium for it
- Families — need functional space: bunk-bed configurations, safe walkways, and practical gear storage rather than aesthetics alone
Building explicit guest profiles for each segment — not just a general “who might stay here” — is what actually determines your finish level, room mix, and rate structure. Skipping this step is the most common reason capsule villages end up with a pod mix that doesn’t match actual demand.
2. Set Your Revenue and Occupancy Targets
Before ordering a single pod, lock in the business fundamentals:
- Target nightly rate (and how it varies by pod tier — standard, family, premium-view)
- Peak-season vs. shoulder-season occupancy assumptions
- Whether the operation runs winter-only or year-round
- Overall revenue goals that these assumptions roll up to
These numbers directly determine how many pods you need and what your realistic profitability model looks like — treat this as a spreadsheet exercise before it becomes a construction order.
3. Position Your Village in the Local Market
Map your offering against what’s already available nearby — hotels, condos, hostels — and look specifically for gaps:
- Budget lodging within walking distance of the lifts
- Boutique micro-cabins aimed at couples
- Social, hostel-style pods for groups and younger travelers
Based on that gap analysis, decide which identity your village will take on:
- A sleek, modern mini-lodge
- A boutique pod hotel
- A social, hostel-style micro-community
- A compact adventure basecamp
Example: Pod-style lodging in destinations like Whistler has succeeded specifically because units sit within a few hundred meters of the lift base — proximity, more than luxury finish, is what drives bookings in this format.
4. Choose a Site Close to the Lifts
Location determines guest satisfaction more than any interior design decision.
Prioritize true ski-in convenience. Aim for walking distance to gondolas or chairlifts, or at minimum a direct shuttle connection — and make sure the path avoids steep or icy sections that would be unsafe for guests carrying gear.
Plan for full winter access and safety, including:
- Snowplow routes that don’t get blocked by parked pods
- Safe, clearly marked drop-off zones
- Year-round emergency vehicle access
- Adequate drainage and dedicated snow-storage areas
Leave several meters of clearance around each pod so plows can operate without blocking doors or walkways — this is one of the most commonly underestimated site-planning requirements.
Follow local planning rules and mountain aesthetics. Alpine jurisdictions typically expect:
- Pitched roofs for snow shedding
- Natural exterior materials — wood, stone, or metal cladding
- Warm, low-glare exterior lighting
- A building scale that matches nearby base-area structures
Meeting these expectations isn’t just about approval — it’s what makes the village feel integrated with the resort rather than dropped onto the mountain.
5. Design the Village Layout and Guest Flow
Define your capacity and pod mix first. Start from your peak-night target, then split units across:
- Standard two-person pods
- Family pods with bunk configurations
- Premium pods with enhanced mountain views
Map a simple, intuitive guest journey, from arrival through to the slopes:
- Arrival and parking (or drop-off)
- Check-in via reception or a self-service kiosk
- Ski or gear locker access
- Walkway to individual pods
- Return route to the lifts the next morning
Avoid routing guests through storage or vehicle-service areas — a clean, direct path matters more in a compact village layout than in a traditional hotel, where interior corridors hide the back-of-house.
Optimize for views and privacy. Stagger pod rows so each unit gets a mountain-facing window rather than a view of the pod next door. Keep pods clear of snow-slide zones and roof-shedding paths, and preserve dedicated space for snow storage and safe walking routes between rows.
Build a central village hub. A small shared building — housing reception, a lounge, a drying room, and a coffee bar or small shop — becomes the social anchor of the village and gives guests a reason to linger rather than treating the property as a pure crash-pad.
6. Build Pods That Perform in Alpine Conditions
Construction quality determines both guest comfort and long-term operating cost.
Use alpine-rated structures. Compare manufacturers’ published snow-load and wind-load ratings before selecting a unit — a pod rated for moderate coastal conditions is not the same product as one engineered for sustained alpine snow load, even if they look identical in a brochure.
Invest properly in insulation, glazing, and heating:
- Strong floor and roof insulation to prevent heat loss through the largest surface areas
- Double- or triple-glazed windows
- Underfloor heating, heat pumps, or infrared heating depending on climate and operating budget
- Heat-recovery ventilators (HRVs) to maintain fresh air without losing heat — critical for preventing condensation and mold in a sealed winter environment
Treat back-of-house utilities like a small hotel, not a campsite:
- Water supply and wastewater systems sized for full occupancy, not average occupancy
- Power distribution planned for peak simultaneous heating load
- Laundry and linen storage
- Waste handling zones tucked behind the hub or in a dedicated service shed, out of the guest sightline
7. Build in Phases to Manage Cost and Risk
Rather than committing to full capacity upfront, most successful villages launch in stages:
- Phase 1: the central hub plus 6–10 pods — enough to test real demand and start collecting guest reviews
- Phase 2/3: additional pods, plus amenity upgrades such as saunas or hot tubs, added once early performance data supports the expansion
This phased approach limits capital exposure while you validate occupancy assumptions against actual bookings, rather than the projections made in Step 2.
FAQ
How close to the lifts does a capsule village need to be to succeed? Walking distance — ideally a few hundred meters — is the benchmark that successful pod-hotel destinations like Whistler have validated. Beyond that, a reliable shuttle connection can substitute, but proximity is consistently the strongest driver of occupancy in this format.
Should a capsule village operate year-round or winter-only? That depends on your site’s off-season demand and whether the resort itself has summer programming (hiking, mountain biking, events). Decide this before finalizing pod insulation and HVAC specs, since a year-round operation has materially different climate-control requirements than a winter-only one.
How many pods should Phase 1 include? Most operators start with 6–10 units plus the central hub — enough to generate real occupancy data without over-committing capital before demand is proven.
Planning a capsule village for your resort? Contact us for alpine-rated unit specifications and a phased-build cost estimate.